On September 24, 2019, CentOS 8 was released, the first version of the system was marked 8.0-1905. In Centos 8 installation does not fundamentally differ from the installation in previous versions of the system, however, small differences still appeared. The article provides step-by-step installation instructions for Centos 8 with comments and screenshots.
1 Distributives
2 Install from dvd iso
3 Install from boot iso
Distributives
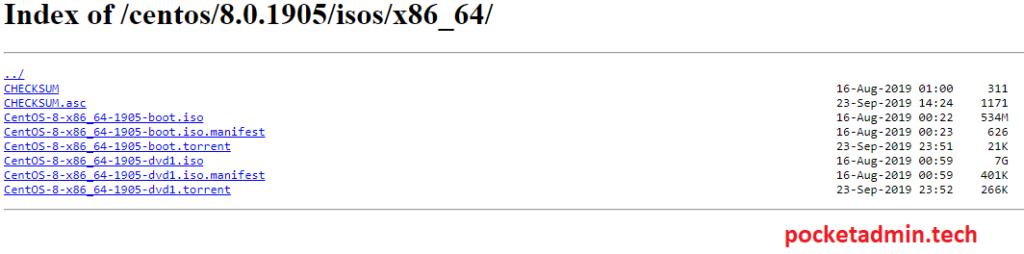
First you need to note the changes in the types of images available:
- 32-bit edition of the system is not available, there is only x64
- only dvd1 and boot (netinstall) images can be downloaded, minimal is missing
dvd1 is a standard image with a full set of packages, boot is bootable, access to the network is required to install with it.
Mirrors are available on the official website. We select any and download the iso image that interests us:

CentOS 8 install from dvd iso
Download CentOS-8-x86_64-1905-dvd1.iso to flash disk or mount it to virtual machine and start setup:

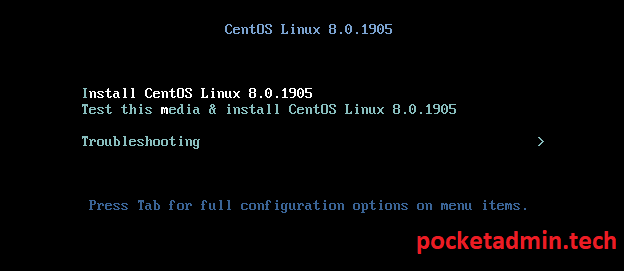
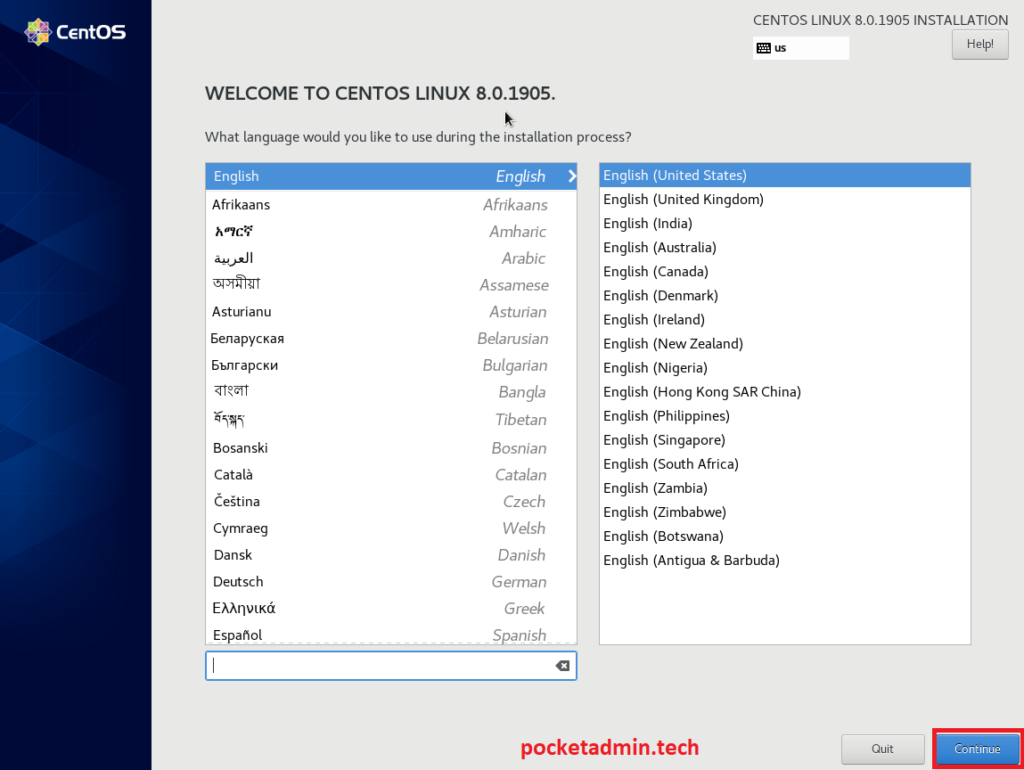
Select the first Install CentOS Linux 8.0.1905 item and press Enter. At the first stage, we will be asked to choose the language used during the installation process. I will continue in English. Click Continue:

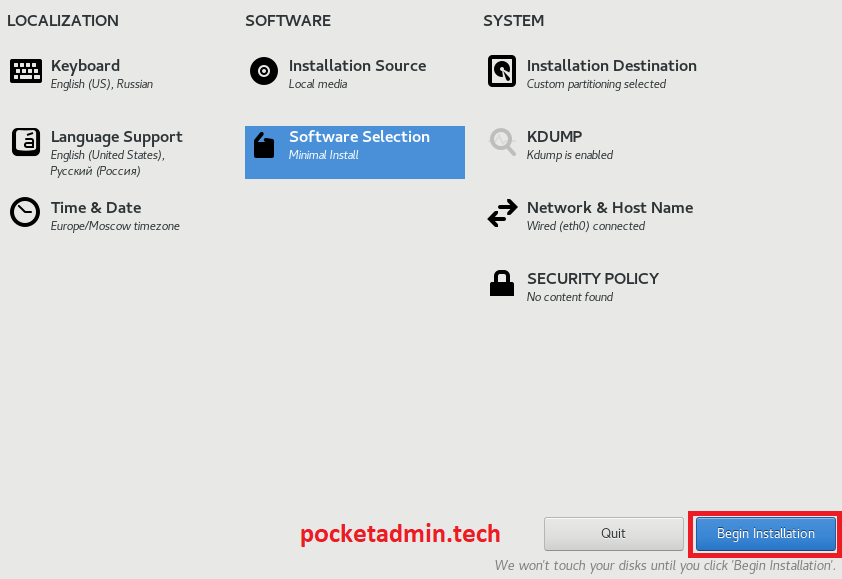
In Centos 8, the installation is carried out from the main page of the Installation Summary, which presents a general menu for the installation parameters sections:

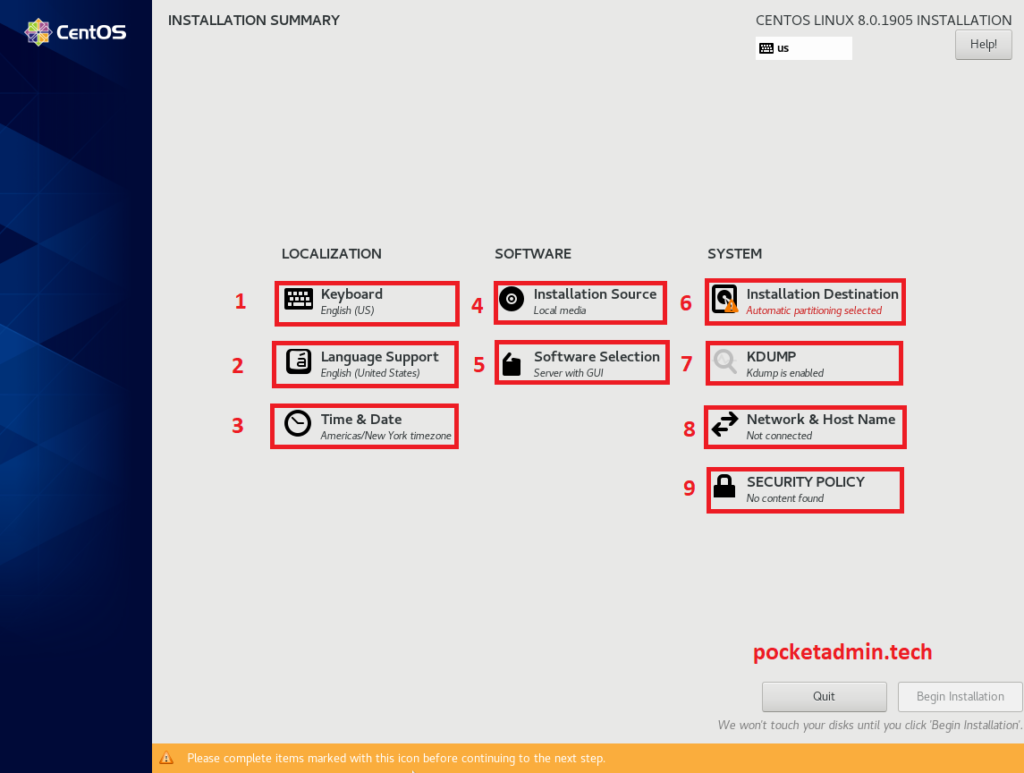
Let’s go through all the points in order:
- Keyboard – keyboard and input settings
- Language Support – installation of additional languages
- Time & Date – time and date settings
- Installation Source – the source of packages. For dvd1, this is a local image; for boot, you can specify a network address
- Software Selection – the choice of installed packages
- Installation Destination – selecting a disk for installing the OS and marking it up
- KDUMP – data collection on critical kernel errors
- Network & Host Name – Network Settings
- SECURITY POLICY – Users and Passwords
Choose Keyboard:

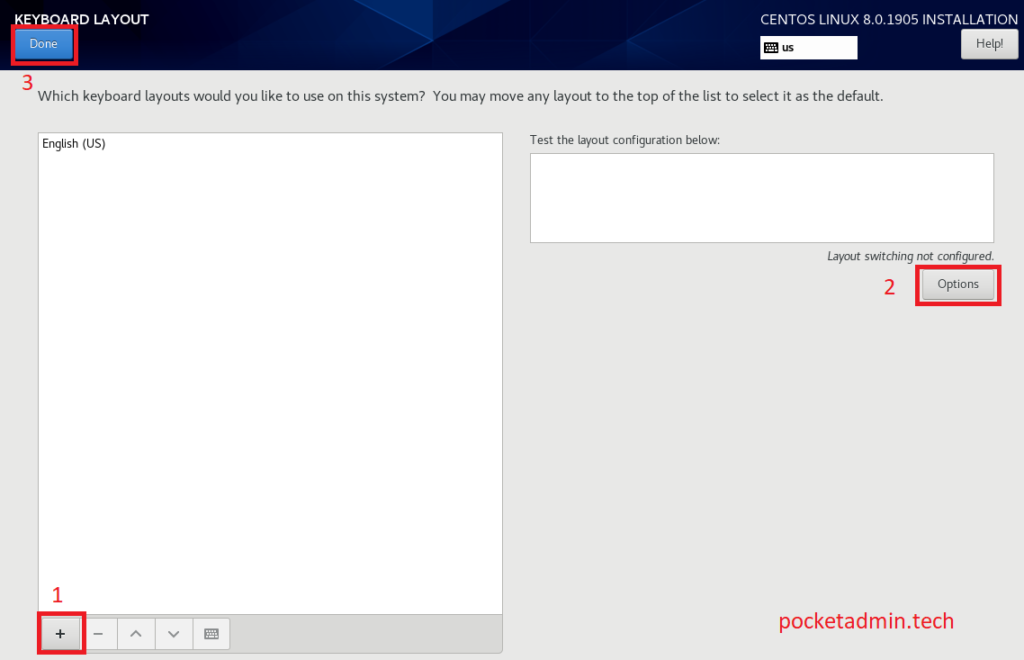
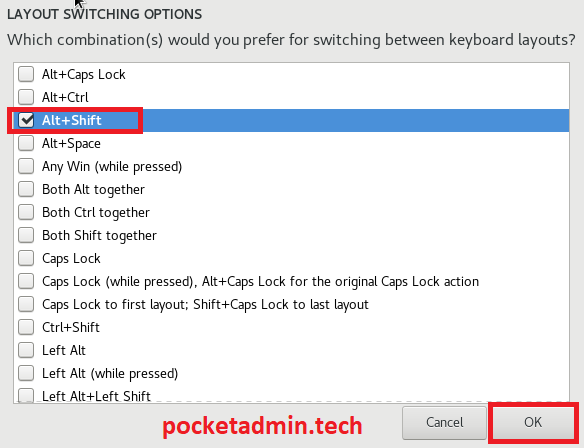
Press + (1) and choose some if you need click Add. Next, go to Options (2) and specify the hot keys for switching the language (I’m used to Alt + Shift) and confirm the choice of Ok.

In the language settings window, click Done (3) and return to the main settings menu.
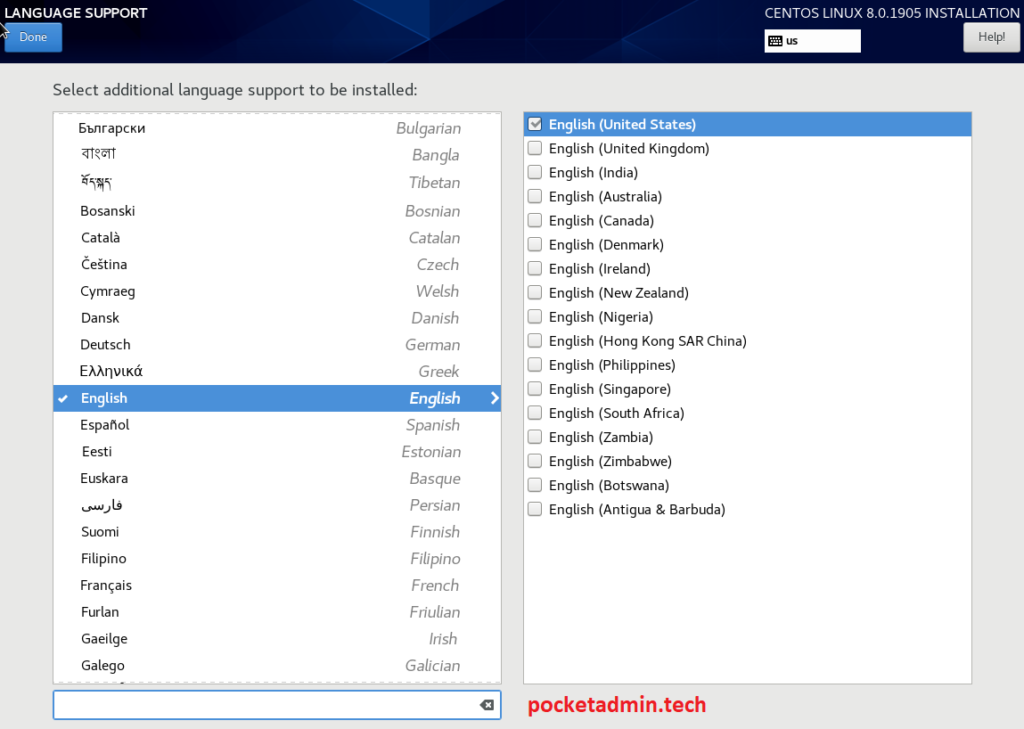
Next, go to Section (2) Language Support. Here you can select the system language. For example, to add the French language (translation). In the search bar write french, select the language and click the Done button.

Go to step 3 Time & Date. We indicate (1) region, city, time (2), time format (3) and date (4). You can also enable time updates over the network (5), but since we haven’t set up the network yet, we cannot turn on synchronization yet. At the end, click Done:


You can skip step 4 of the Installation Source, for installation with dvd1 iso it is not relevant and will be considered in the installation with boot iso.
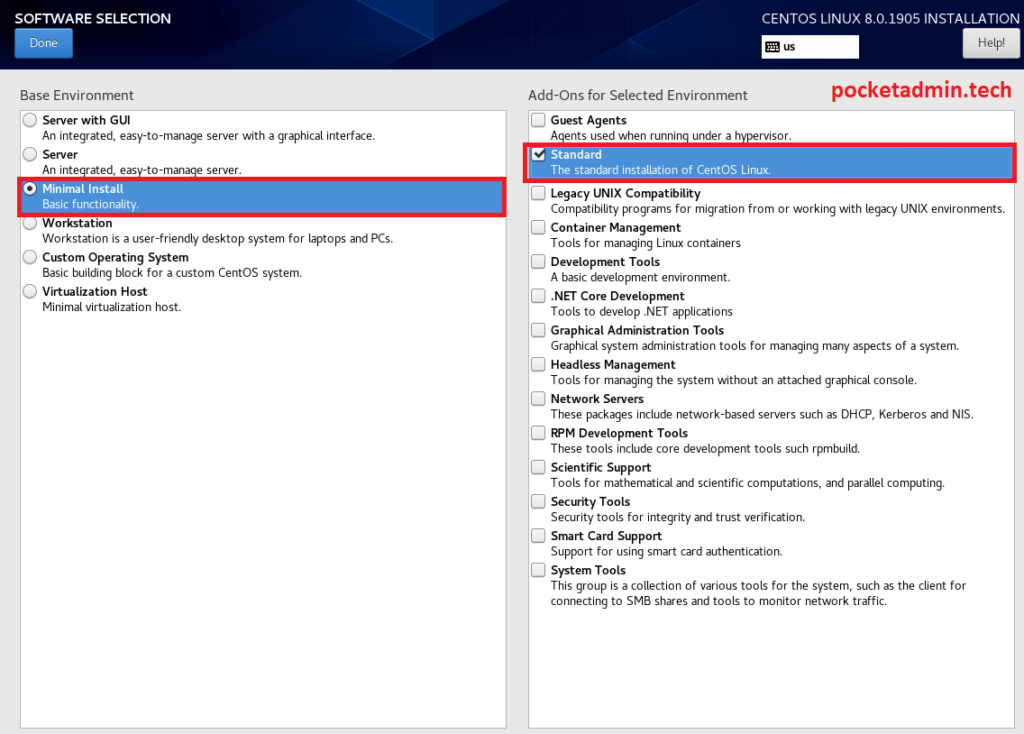
In Section 5, Software Selection, we select the packages that need to be installed. The choice depends on your specific tasks, but I always set a minimum. After selecting packages, click on Done:

Go to step 6 Installation Destination. The installer will show the available disks in the system (1). You must choose which drive the OS will be installed on. In my case, he is alone, so there is no need to choose. In Add a disk … (2) you can additionally connect network drives, SCSI drives, etc.
In Storage Configuration, the method for partitioning the drive is selected. Custom – manual, where you need to independently determine the size, mount points, file system and other parameters: it all depends on the tasks and deserve a separate article. Therefore, now we select Automatic and enable the system to automatically partition the disk: lvm will be used, on which the boot partition 1GB will be created, the swap partition (depending on the amount of RAM), and the remaining space will be allocated to the / root partition.
Well, the choice of Encryption (4) allows you to encrypt data on the disk. This parameter affects performance and therefore I would not recommend choosing it without a valid reason. As always, click Done at the end.

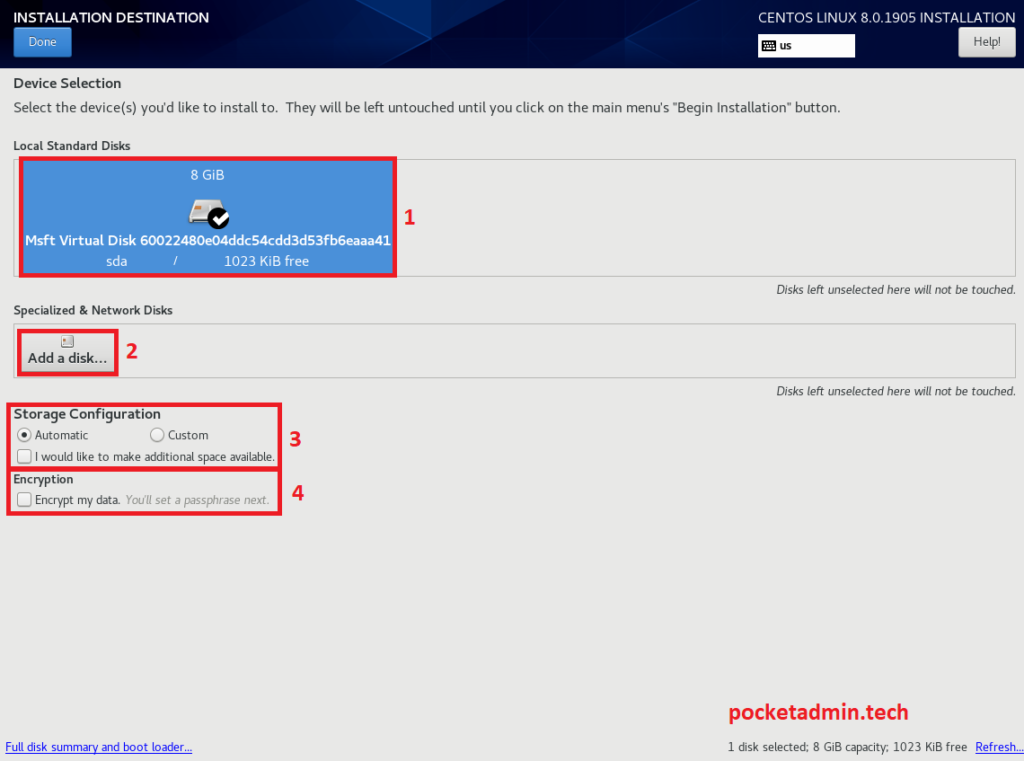
KDUMP (7) is responsible for diagnosing and analyzing the causes of kernel failures. You can set the amount of memory for it or disable it completely. If we don’t know what we need it for, we leave it by default.
Next, configure the network connection Network & Host Name (8):
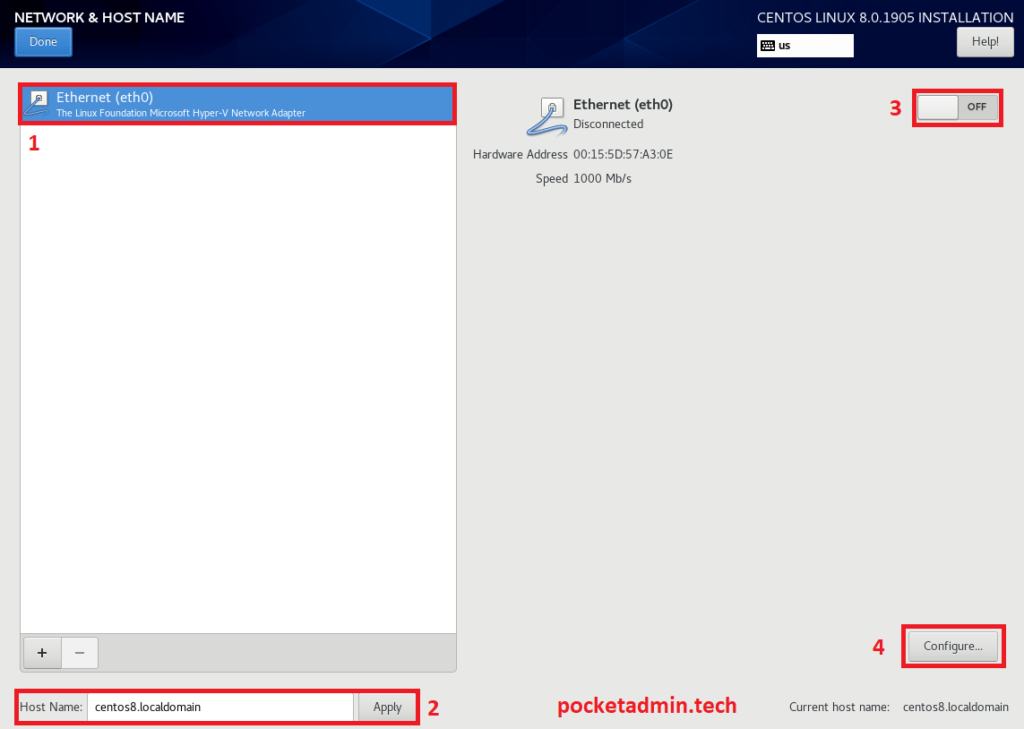
Select (1) the network connection, in the Host Name field (2), if necessary, specify the name of the machine, click Apply. Turn on the network (3): if ip-addresses are distributed via dhcp – you will see the received address immediately on this screen. If you need to specify the static ip-address manually, then select Configure (4):

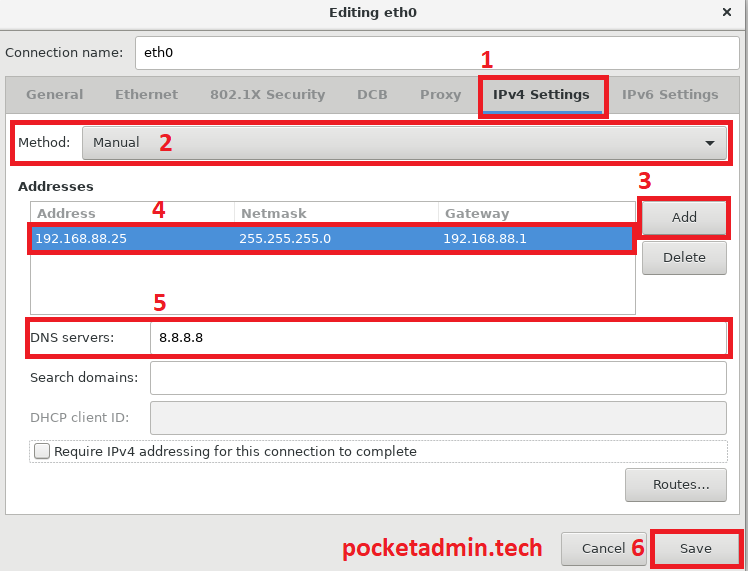
Go to the IPv4 Setting tab (1), select the Manual method (2) and click the Add button (3). In the line that appears (4), specify the address, mask and gateway. In the DNS servers (5) field, specify the dns server, for example, Google. To specify multiple servers, they are separated by commas. At the end, click Save (6). We configure network interfaces with the Done button. By the way, after that, in the time settings, you can enable synchronization over the network.
Now in the main settings menu, click the Begin Installation button and then the installation process will begin:

Well, for now we are asked to set a password for root and add a new user if necessary:

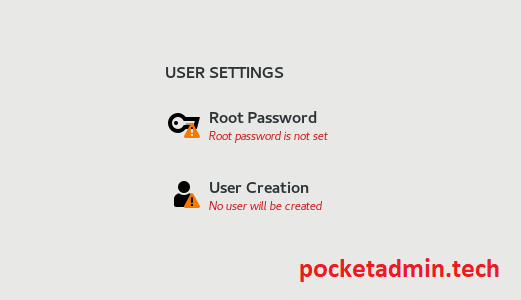
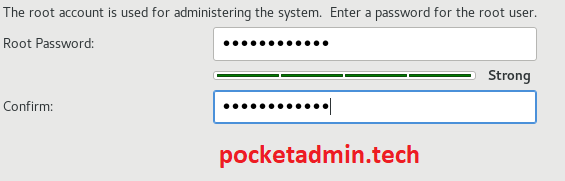
Choose Root Password and specify a new password two times:

If you need to create a new user, select User Creation:

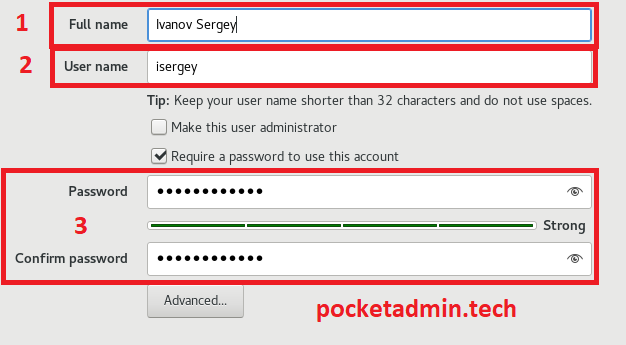
In the Full name (1) field, specify the name, in User name (2) – login and set the password (2) and exit by pressing Done.
It remains only to wait for the installation to finish and click the Reboot button:


CentOS 8 install from boot iso
All actions for installing from a boot image are similar to those described in “CentOS 8 installation from a dvd image“, except that you need to download CentOS-8-x86_64-1905-boot.iso. Next, you must configure the network connection, and the repository is indicated in the main menu of installation settings in Software Selection (5):

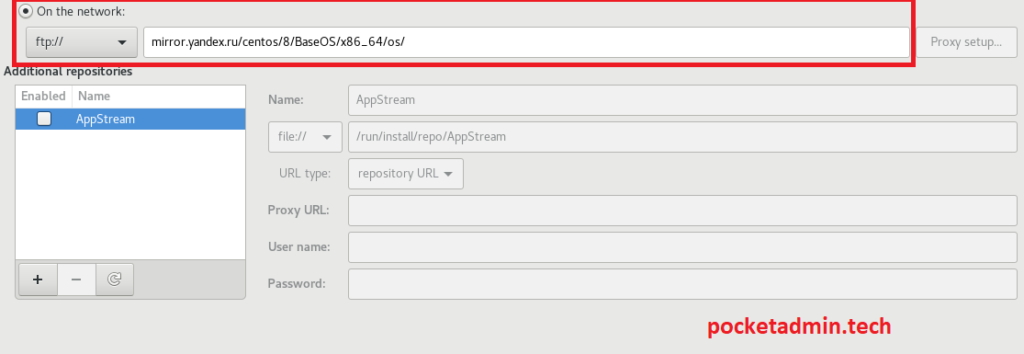
We select On the network, ftp:// protocol and specify the repository address, for example: mirror.yandex.ru/centos/8.0.1905/BaseOS/x86_64/os/